Virtualization is available to everyone with Windows, and we are going to see how to enable Hyper-V in Windows 10.
Enable the Hyper-V role through Settings
- Right click on the Windows button and select ‘Apps and Features’.
- Select Programs and Features on the right under related settings.
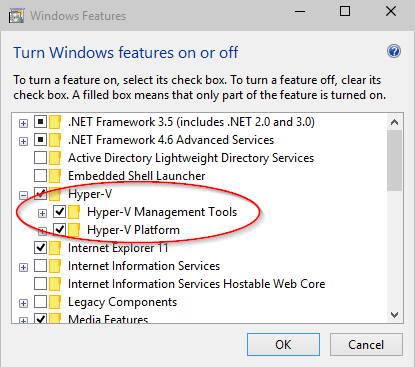
- Select Turn Windows Features on or off.
- Select Hyper-V and click OK.

Enable Hyper-V with CMD and DISM
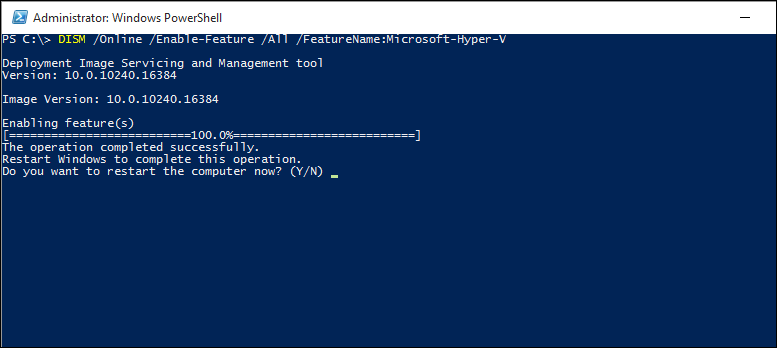
To enable the Hyper-V role using DISM:
- Open up a PowerShell or CMD session as Administrator.
- Type the following command:
DISM /Online /Enable-Feature /All /FeatureName:Microsoft-Hyper-V PowerShell : One of the quickest ways to start PowerShell, in any modern version of Windows, is to use the Run window. A fast way to launch this window is to press the Win + R keys on your keyboard. Then, type powershell and press Enter or click OK.

thank you 🙂
Views: 5


 Fix Brawl Stars Connection Problems